 CONNECTICUT
How an egress escape system works
Follow the window, well, ladder, and cover through real Connecticut project photographs, with practical questions for your installation handover.
Know the route before you need it.
Ask your installer to demonstrate the window, screen, well access, and any cover or grate on your completed system. These Connecticut project photographs help identify the components to discuss.
1. Open the window into the room.
The Winchester photo shows the sash open inward. Ask the installer to demonstrate the handle, full opening movement, and any screen operation for the specific window you select. Plan furniture and storage around that movement.
See the project comparison ↗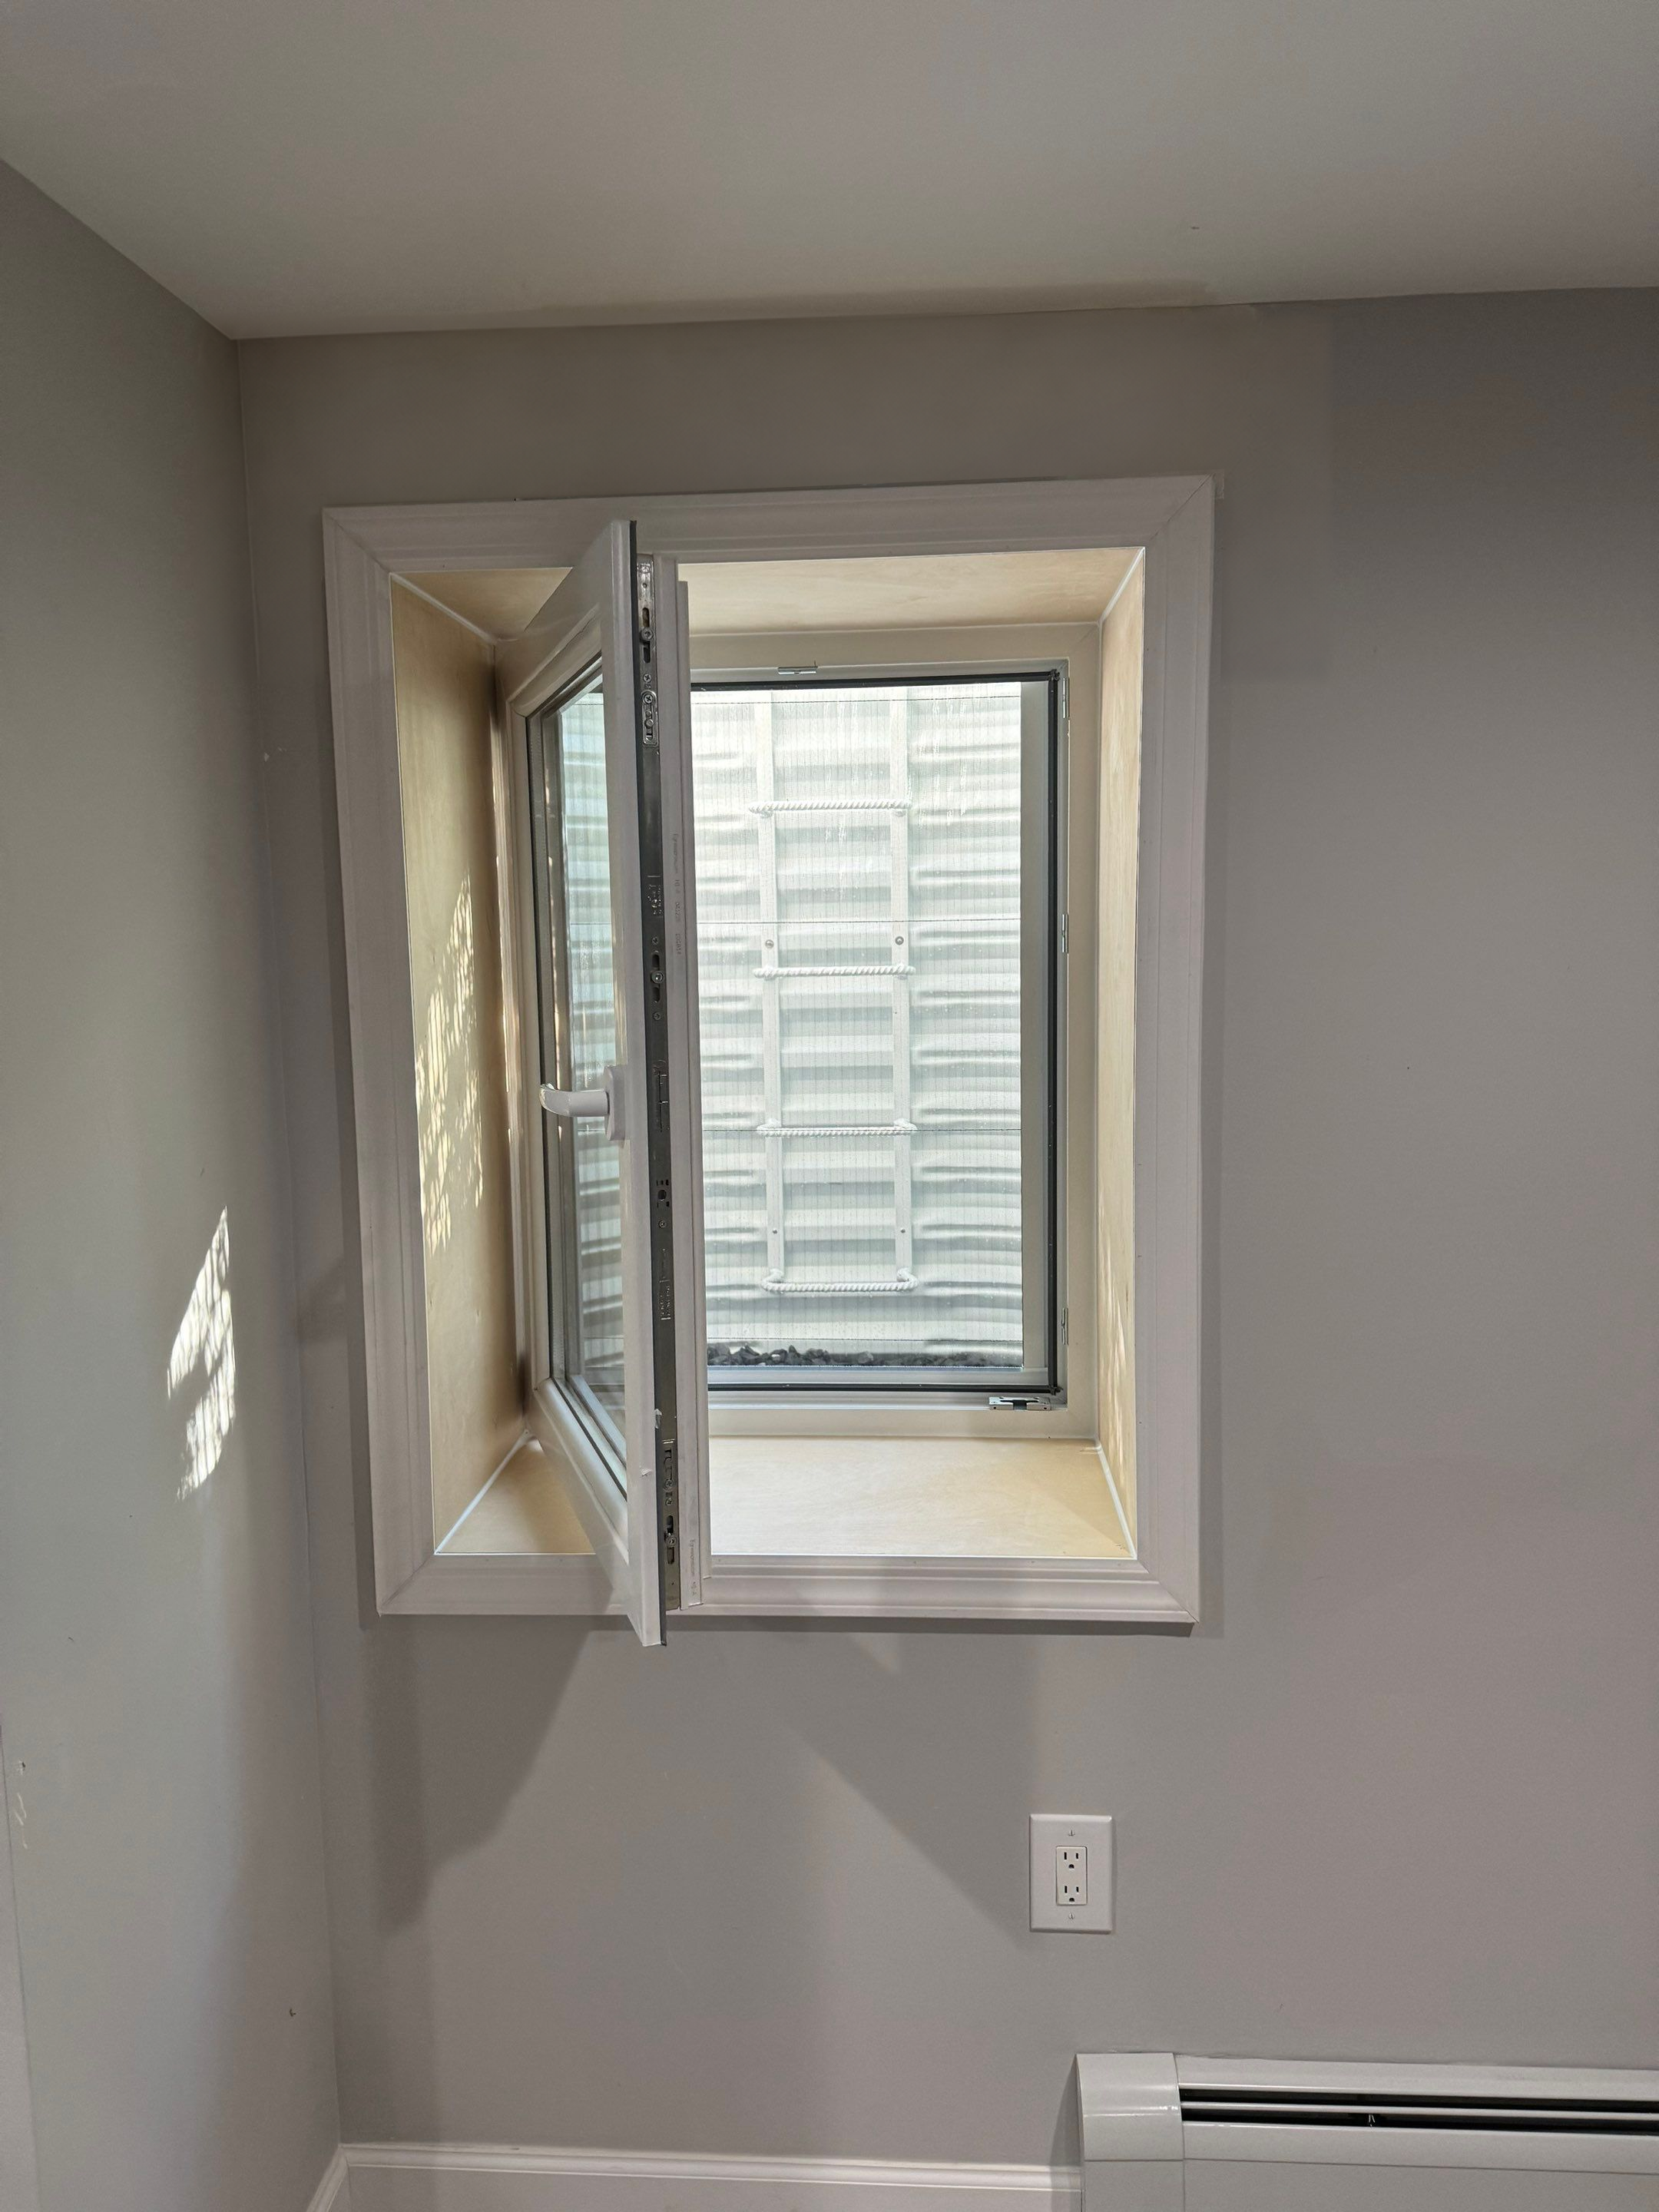
2. Understand the access through the well.
The exterior Winchester view shows the curved well, window, and access ladder together. Review the transition from the room into the well and from the ladder to the yard on your own system.
See the project comparison ↗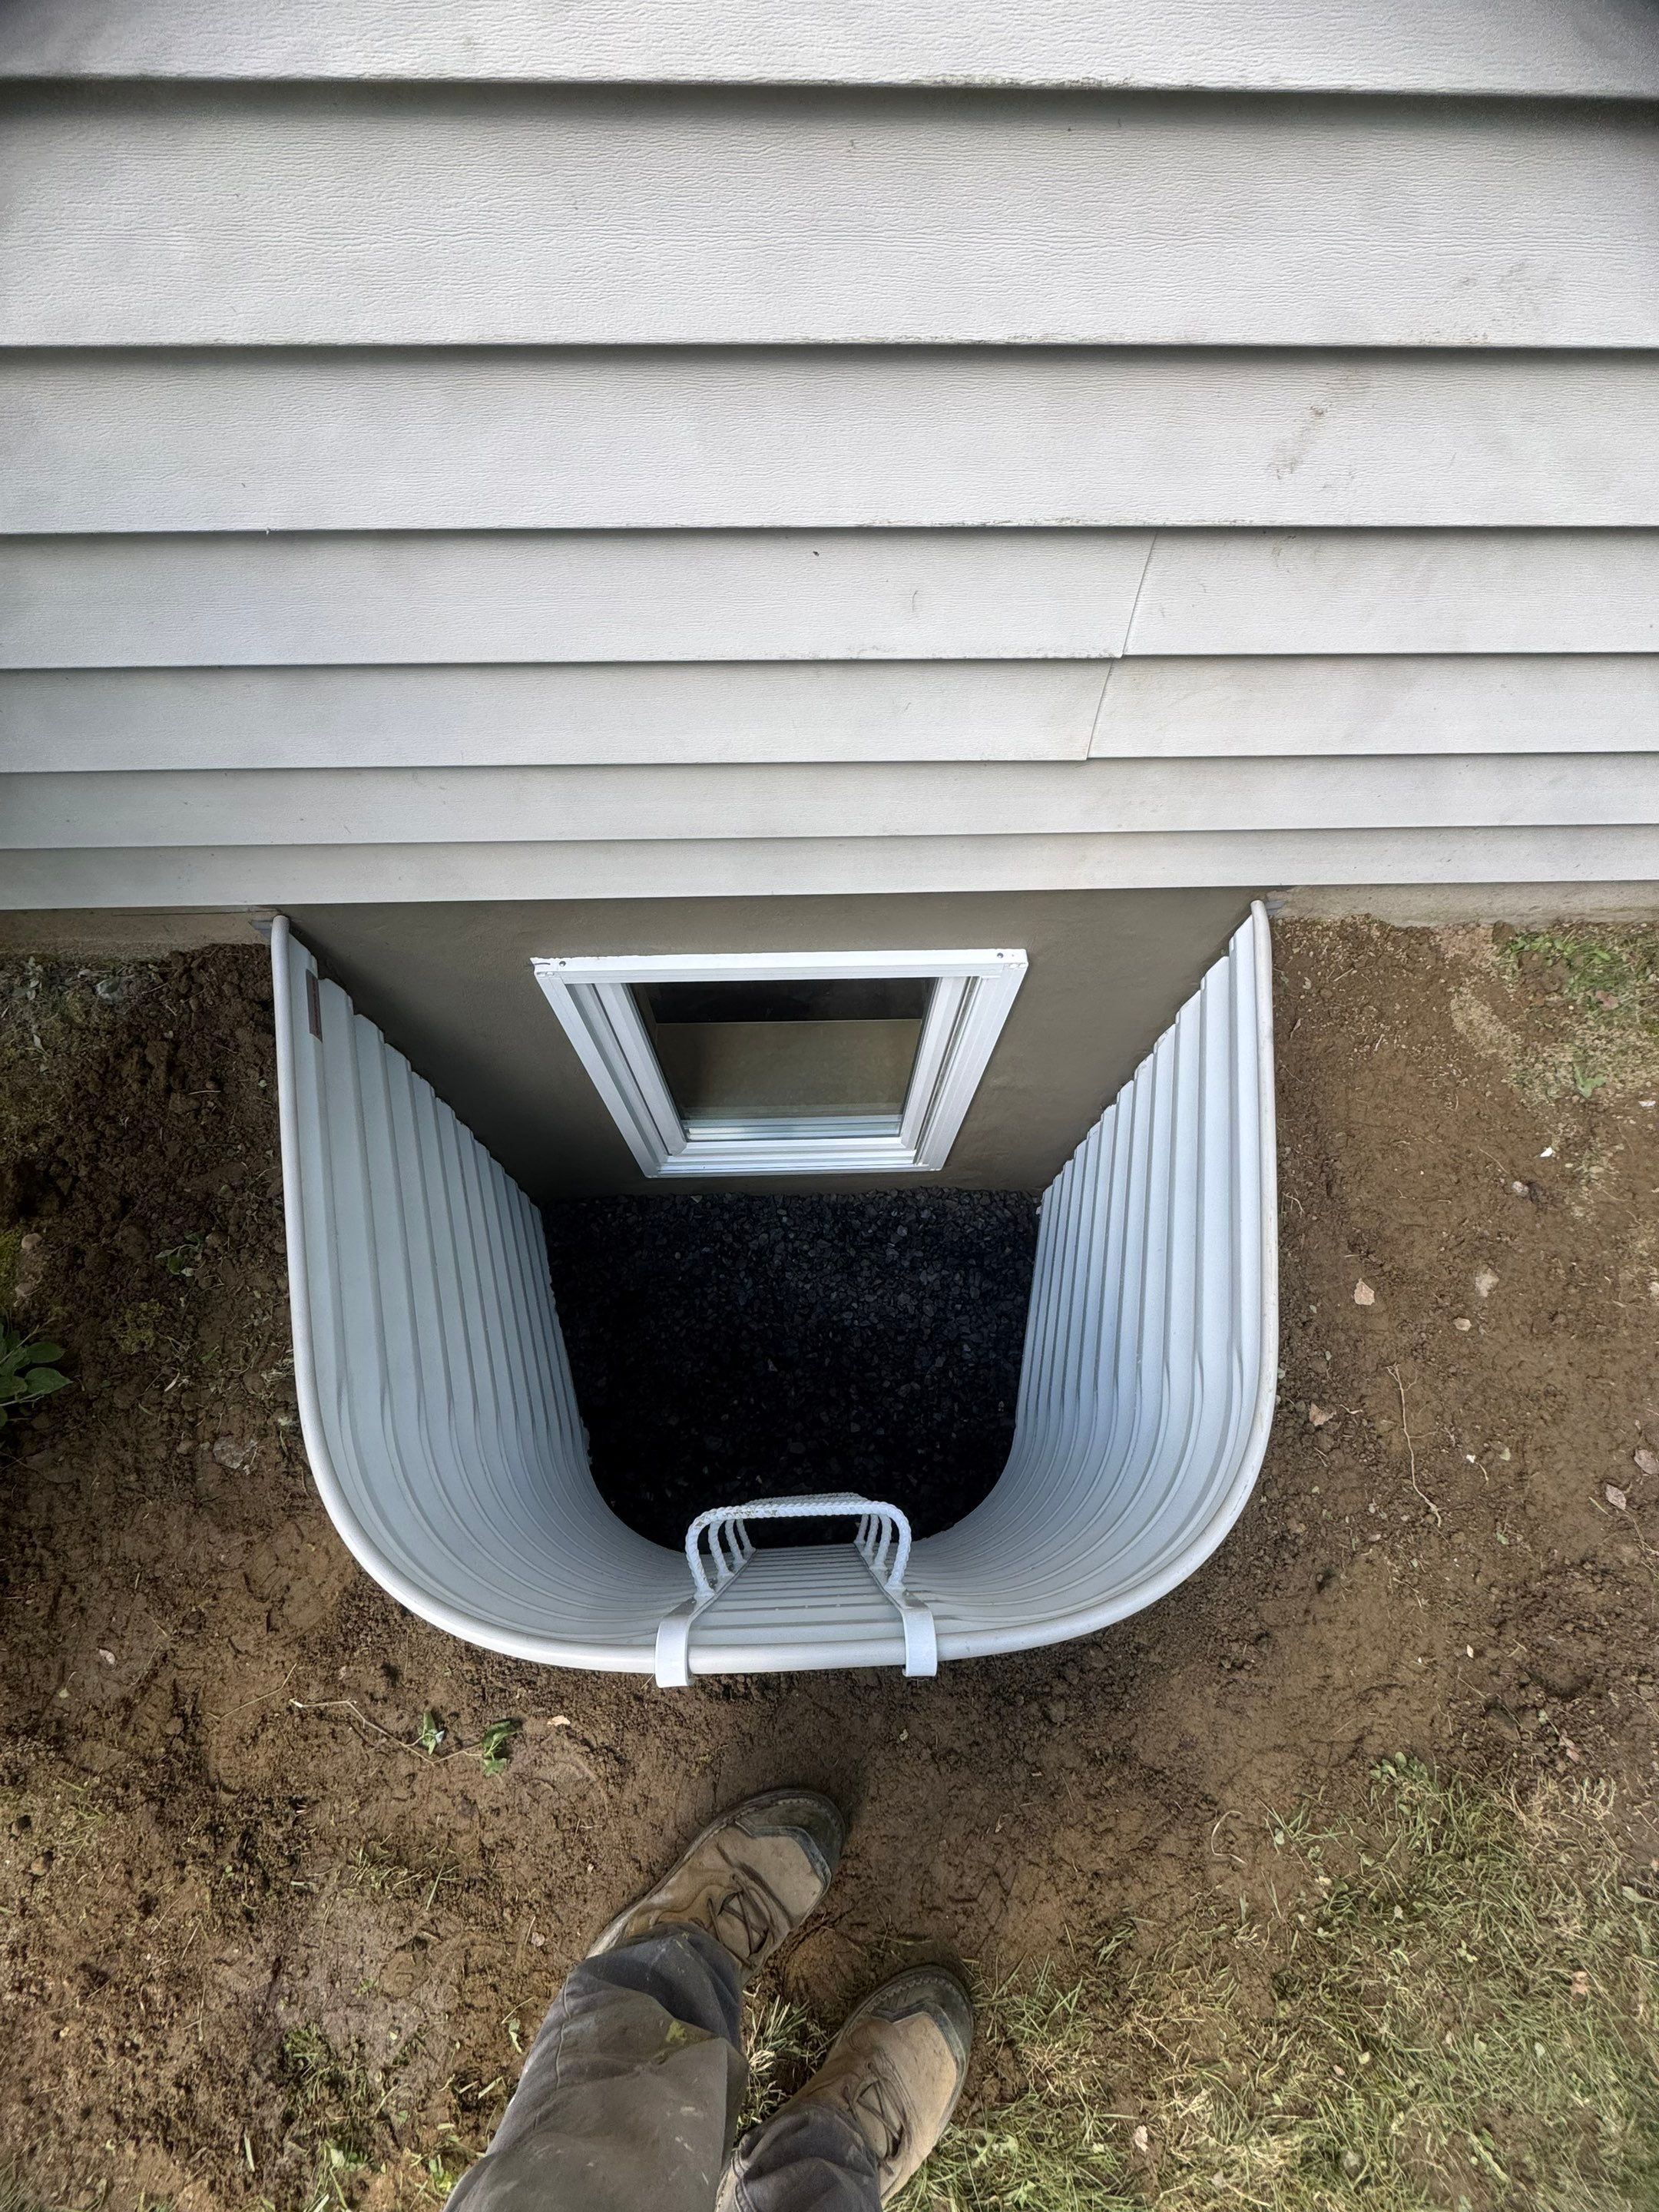
3. Check the cover and grate operation.
The Waterford exterior photo shows a clear cover and mesh grate. Ask for a demonstration of the release method on the actual products in your estimate, including how each part is operated from inside the well.
See the project comparison ↗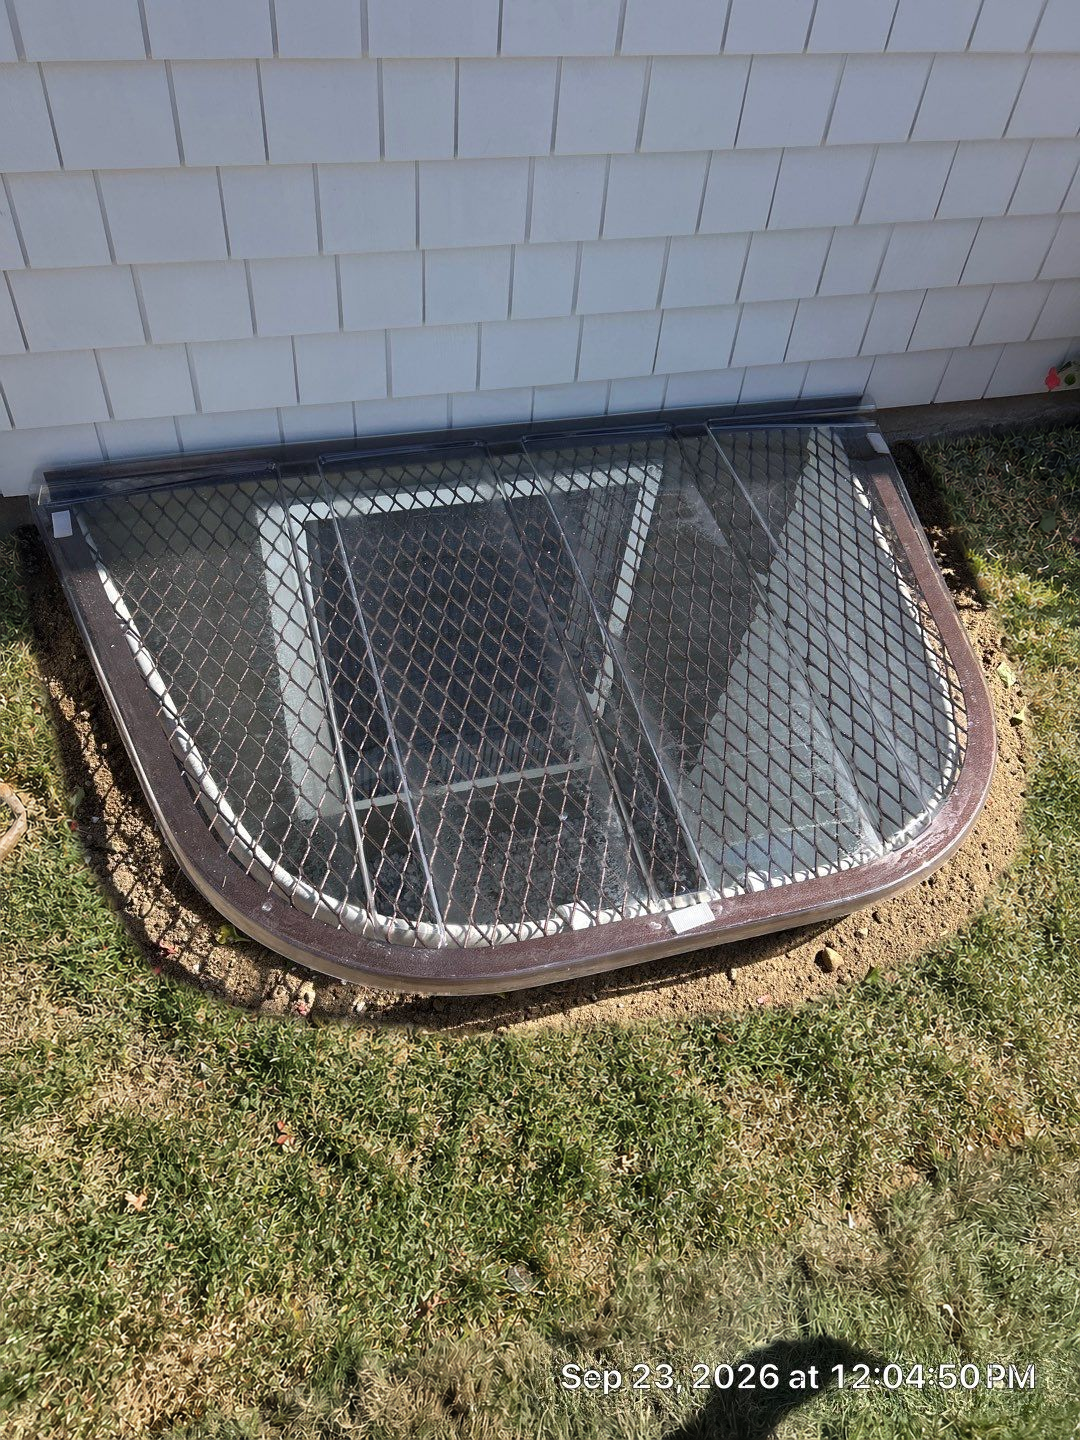
At the installation handover.
- Have the installer identify and demonstrate every handle, screen, release, cover, and access feature.
- Keep the approach and the operating space clear of furniture and storage.
- Keep the supplied product instructions and maintenance information with your home records.
- Ask how to inspect the well, keep drainage features clear, and request service if a part becomes difficult to operate.
Prefer to watch?
Explore Egress Pros’ video library, then ask the Connecticut team to demonstrate the specific products proposed for your home.
Visit the Egress Pros Video Library ↗Let’s look at your home.
Share your town, opening, and goals with our Connecticut team.